dodge and burn in PS Elements II

vftt.org

Help Support vftt.org:

This site may earn a commission from merchant affiliate links, including eBay, Amazon, and others.

forestgnome

New member
Joined
Dec 3, 2004
Messages
2,625
Reaction score
600
Location
..Madison, NH
I'm trying the D&B tools in PS for the first time, thanks to a tutorial at a link provided by Jim Salge.

http://www.photoshopessentials.com/photo-editing/dodge-burn/


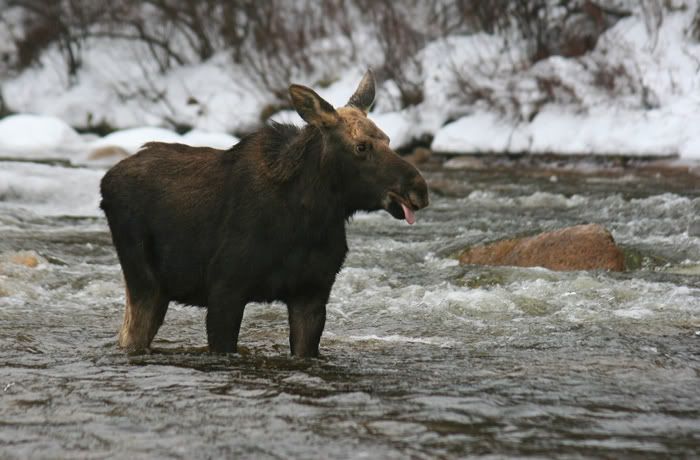
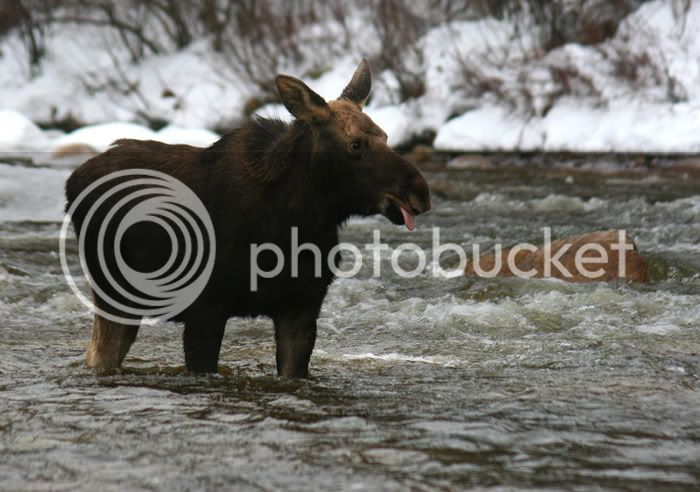
Here's my first try. I've only tried burning the dark part of this photo (calf/subject). Tonight, I'll try dodging the snow.

before...
139-copy1.jpg


after...
139DB1.jpg


C&C?
 
Last edited:
Make sure you get your thinking cap on right.

Dodging (in darkroom terms) means holding back exposure, which will lighten the dodged part of the image.

Burning in (in darkroom parlance) means giving additional exposure to that part of the image, which will darken it.

From what I've seen, the Adobe people have been very good at using common trade parlance to describe operations in their graphic arts programs as they have moved us from physical to electronic processes.

G.
 
Yup. It sounds backwards, saying more exposure = darker, but it's because it's part of the negative-to-positive step in traditional film processing and so more exposure does indeed make that portion of the resulting print darker.
 
Have you also considered playing around the the overall greyscale? I can bring out more detail on the moose simply by playing with my display gamma. Of course, it also lightens everything else too.

It is simpler than burning or dodging, but it affects the entire image rather than just one part.

Doug
 
I like the improvement that came from lightening the moose because the eye reads much better and we can see additional texture in the fur. With almost all animal and people photos the eye is key and needs to be properly exposed (not too dark or light).

Overall it does appear that the "after" image is a bit lighter and has less contrast than the original. Perhaps that was a side effect of the dodging or perhaps it was additional editing. In some respects the moose has better separation from the snowy background in the original image, especially with the ear on the right in the photo. I would try just dodging the face portion of his head; and leave the top of his head and ears alone so that they would stand out more against the snow as they did in the original. The dodge on the rest of his body looks OK.

You mentioned burning in the snow. I believe the tone of the snow is about right for the overcast day. Darker snow would tend to look unnatural and conversely a lighter background would tend to distract attention away from the moose.
 
Cute picture!

I'm not sure if the tool is available in Photoshop Elements II, but using "shadow/highlight" allows you to adjust the midtones, highlights, and shadows for the entire image (under the Enhance->Lighting menu I think). It can produce effects similar to dodging shadows and burning highlights.

^MtnMike^
 
I think this is another good shot to use this technique on and the edit looks pretty good.

I would use the dodge/burn layer over shadow/highlight or overall lightening because the contrasts in the rest of the image look good and should be preserved. The snow has a good exposure on it, and the rocks in the stream look good. The moose simply is too dark with no light on him...so lighten him up! Looks great...
 
This is a good shot to apply dodging and burning, because those tools allow you to adjust specific parts of the scene. Most of the scene is perfectly exposed, you just want to brighten details of the moose fur and reduce the distraction of the small area of overexposed snow just above the moose's back. The second shot is a definite improvement.

For shots where more of the scene needs improvement, here are two quick and easy techniques that often help.

EDIT: I've never seen PS Elements, I assume these are possible in it. I use the GIMP.

1) Contrast mask
(pretty sure there's a prior VFTT thread on this, if not, Google it)
This can also be adapted to affect only part of the scene, by erasing part of the mask. (I used that trick while editing the moon in the RAW-vs-JPEG thread a couple of weeks ago)

2) Levels tool.
Probably my favorite tool so far. Can transform a scene that's a little grey into one that really "pops".
 
Last edited:
I think it looks great - just the right slight touches to bring out the details from the shadows of a higher-contrast scene. Nice to see the expression on Mr Moose's face!
 
If you own PS Elements you can upgrade to full Photoshop for 50% off the regular price. I wish I'd known that before I spent $700 on it last year!

In Photoshop you have a Shadows/Hightlights adjustment that targets specific areas. This is a 2 sec adjustment:

2428622530100209210S600x600Q85.jpg
 
Top